Saturday

Fabulous Faux Marble

I was blown away when I saw this.  I have always been a fan of marble, but not so much a fan of the price tag.  I think this is incredible.  Danika took her drab countertops and turned them into a masterpiece using some faux painting techniques.  It looks just like the real deal!  I may just have to try this.  This project comes to us from Danika at Gorgeous Shiny things.  See the full post here.  She is also doing a video tutorial this weekend so be sure to check that out too!


here it was before...
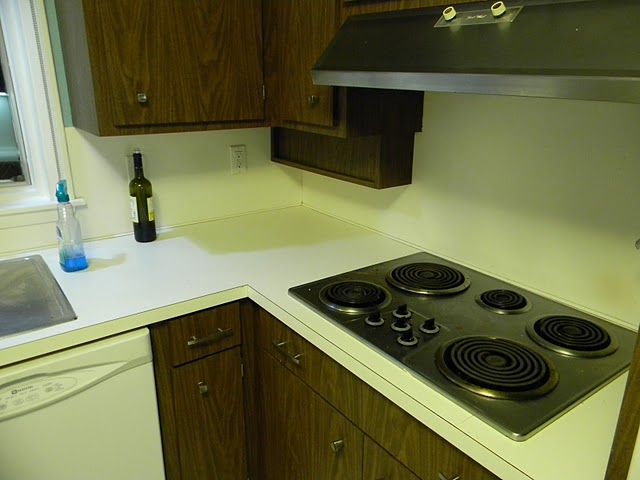


and after...simply stunning
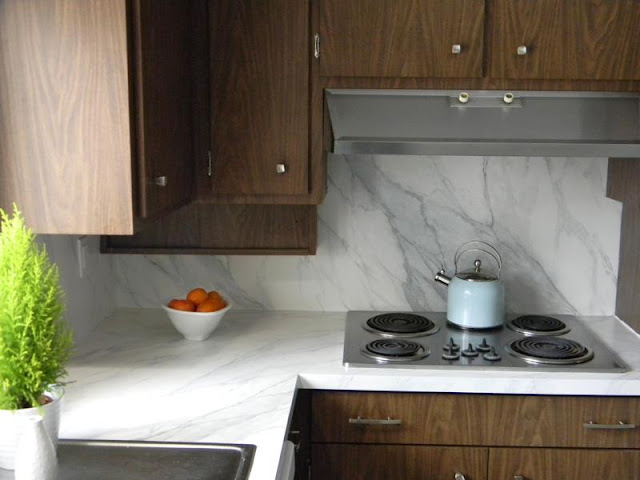


Amazing, right?

It reminds me of the real deal


source: apartment therapy


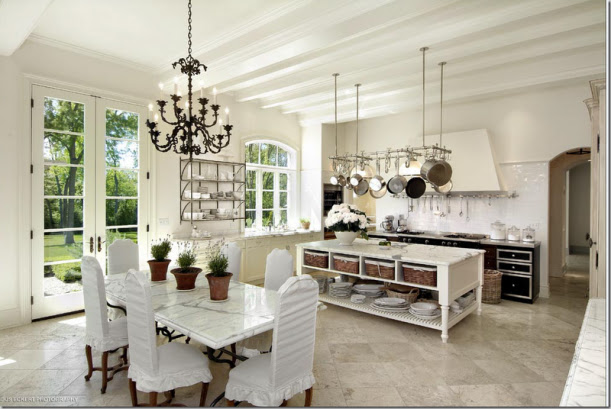
LOVE LOVE LOVE this kitchen...

can't remember the source....


 source

love the double drum shade pendants


source

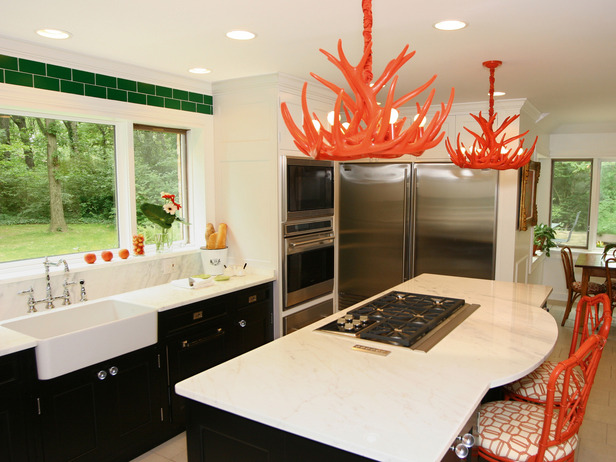
not crazy about the green subway tile border, but I'm loving the bold, fun pop of color in those chairs and light fixtures....

source

So would you try this DIY?  I think I might just try it on a small end table.

Thursday

Bachelor Pad Makeover

I showed you a sneak peak of this Bachelor pad makeover a few days ago with the starburst mirror before and after and now it's time for the full reveal!  

Here are some of the wants/needs of the client:
*Quality furniture that he can have for many years
*neutral walls
*modern art
*clean lines
*not too contemporary

So, we'll start with the before...

Living Room

and after!


and for the bedroom...

The client had already purchased his bedroom furniture and bedding including all the throw pillows (it was a set from Bassett) so that set the tone of the room.  All that was needed was a little accessorizing and some lighting.

Bedroom Before


We spruced up the entry way a little bit too by adding some framed pictures I took of his adorable boxer that I wanted to steal  borrow for the day.  He was the sweetest.  We also added some silver branch hooks for coats, a dog leash, etc.


So now you've had the tour, what do you think?

Tuesday

Really Good Cake

This cake is REALLY good, I wouldn't steer you wrong.

Banana Caramel Cake

This recipe actually comes from a book called, "The Cakemix Doctor."  I'm sure most of you have heard of it.  It focuses on taking store bought cake mixes and "doctoring" them up.  This actually reminds me a little bit of bananas foster with the banana caramel combo.  It's delicious.  The cake is very good and the icing is even better!

So here you go....

For the cake:
  
  • Solid vegetable shortening, for greasing the pans (I used butter)

  • flour, for dusting the pans

  • 1 package plain yellow cake mix, (18.25 ounces)

  • 1/2 cup light brown sugar, packed

  • 1 teaspoon ground cinnamon

  • 2 medium-size ripe bananas, peeled & mashed (about one cup)

  • 1 cup water

  • 1/2 cup vegetable oil

  • 3 large eggs

  • 2 teaspoons crème de banane liquer (optional-I used banana flavoring)

  • 1 cup pecans, chopped toasted (optional for topping frosting)


  • For the frosting I used a recipe I had used before since caramel icing can be tricky and I knew this one was easy and good.


  • This is the recipe I used for the icing: (or you can try the one listed with the cake here.)


  • 1/2 cup (1 stick) butter 

  • 1 cup packed dark brown sugar 
    1/3 cup heavy cream, or more if needed 
    1 (16-ounce) box confectioners' sugar 
    1 teaspoon pure vanilla extract 
    1 cup chopped nuts, optional (I chose to leave this off but I'm sure it would be good with them)

    Directions:
    Place a rack in the center of the oven and preheat the oven to 350 degrees. Lightly grease two 9-inch round cake pans with solid vegetable shortening then dust with flour. Shake out the excess flour. Set pans aside.
    Place the cake mix, brown sugar, and cinnamon in a large mixing bowl. Add the mashed bananas, water, oil, eggs and crème de banane liqueur (if desired). Blend with an electric mixer on low speed for one minute. Stop the machine and scrape down the sides of the bowl with a rubber spatula. Increase the mixer speed to medium and beat for two minutes more, scraping the sides down again if needed. The batter should look well blended and the bananas should be well pureed. Divide the batter between the prepared pans. Place the pans in the oven side by side.
    Bake the cakes until they are lightly browned and a toothpick inserted in the center of each layer comes out clean, 30 to 32 minutes. Remove the pans from the oven and place them on wire racks to cool for ten minutes. Run a dinner knife around the edge of each layer and invert each onto another rack so that the cakes are right side up. Allow them to cool completely 30 minutes more.
    Prepare the Quick Caramel Frosting (ingredients and recipe below). This will take only 5 to 10 minutes; therefore, time the frosting preparation so that the cake has cooled enough and is ready to frost.
    When the cake layers are cool, transfer one layer, right side up, to a serving platter. Frost the top of the layer with the warm frosting, working quickly because it will firm up as it cools. While the frosting is still warm, you may want to sprinkle toasted pecans on top of the cake so that they cling to the frosting. . Place the second layer, right side up, on top of the first layer and frost the top and sides of the cake, making sure to work quickly with clean, smooth strokes. Let the cake cool at least one hour for easier serving.
    Icing:
    Melt butter in a saucepan over medium heat and stir in brown sugar and cream. Bring to a boil, and transfer to a mixing bowl. Add confectioners' sugar and vanilla. Beat with a handheld electric mixer until it reaches a spreading consistency. At this time it may be necessary to add a tablespoon of heavy cream, or more, if frosting gets too thick. Just be sure to add cream is small amounts because you can always "add to", but you can't take away. Frost cake and sprinkle top with chopped nuts, if desired. 

  • Monday

    Before and After and Sneak Peak

    Today, I have a before and after for you and a little sneak peak into a masculine bachelor pad makeover I just finished. 

    Love, this mirror.  It was in need of a little fixing up so I gave it a fresh coat of Rustoleum's aged brass spraypaint and had a mirror cut for the opening, because the original one was missing.


    I decided to use it in a client's home to add a trendy touch.  The bold chunky "rays" made it look a little more masculine to me than the traditional starburst mirror.  He loved it and I think it really looks great in the space!  In fact, I kind of wish I had kept it, but there's always another deal out there for me to find! :)

    So, here's the after.  I'll be sharing the rest of the apartment soon!


    UndertheTableandDreaming

    Thursday

    Large Wall Decor

    Today I have for you, an easy piece of large DIY art.  I actually ended up making this project for very little cashola.  I just used mostly things I had laying around the house and some things I got for free.

    I started out with this window that I found on the side of the road.  It was FREE!  It had been sitting in the garage for a while when this idea came to me.

    So, here's the window before, after I sanded and removed as much of the old chippy paint as possible.


    Then, remember this mirror I made here.


    Well, I saved the leftover part of the decal. (the part that's left once you peel off the part you need)  Does that make sense?  Most would just throw this away, but I figured I may be able to use it for a project in the future and I was right!  I like to reuse stuff, it makes me feel like I'm "going green" :)

    So, I stuck the leftover frame to my window.  This worked out great because the edges were sealed by the adhesive.  Then I covered the rest of the window with magazine pages and tape to protect them from the overspray.  Then, I sprayed it with some teal spraypaint.


    Next, I used some modge podge to decoupage some leftover chevron material I had to the window to create an interesting background. (forgot to take pics of this)

    and here it is all finished in my booth.  It would make a great statment as a large piece of art or you could even use it as a message board if you wanted to  


    The glare makes it look a little funny so just ignore that little white part on the bottom of the chair.  It was hard to get the light not to make it look funny.


    Wednesday

    Sunburst Mirror

    Since we are on the subject of all things sunburst/starburst I thought I would share with you another great find that I snatched up the other day.  I've been adding small little touches to our living room recently to update it and give it a fresh look.  I wanted a large mirror of some sort to hang, but all of the ones I found were way out of my budget.  I stumbled upon this one in Garden ridge for a great deal.  It was actually a clock but I knew I could easily change that.

    I meant to take a before picture but I forgot.  However, I can show you a picture of what the clock looked like to give you an idea.  It was a little tacky and the rest of the piece was black/silver and just not my style.


    So, I spraypainted it with Rustoleum's aged brass spray paint and replaced the clock with a round mirror from the craft store.  I love it and it definitely makes a statement in the room.


    I also added a few fun, new Chevron pillows that I made out of the leftover fabric from my dining room makeover


    I'm working on a few more changes that I'll share soon!


    Tuesday

    Fun New Find

    A couple of weeks ago we spent the weekend in the mountains with some friends and of course we had to include a little thrifting/antiquing.  We ventured out to a local antique shop and I found this awesome starburst clock for around $20.  (I've found similar ones online for $70)  Sounds like I got a pretty good deal.