Friday

DIY sea fan art

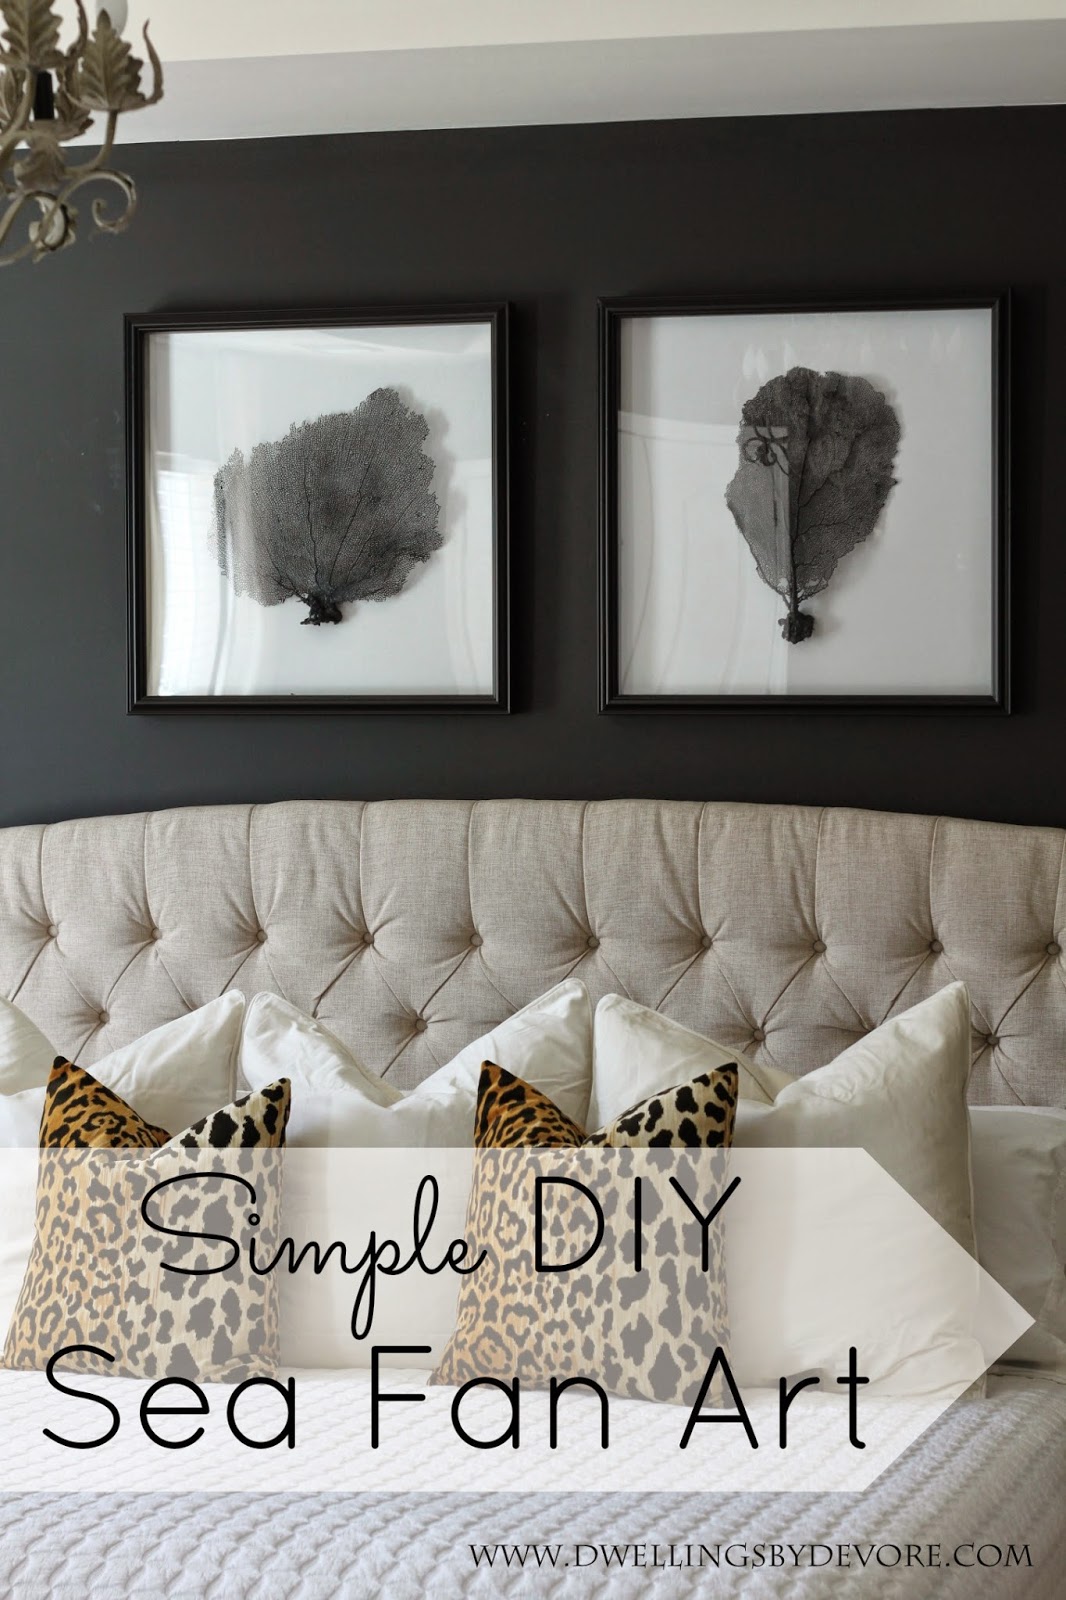
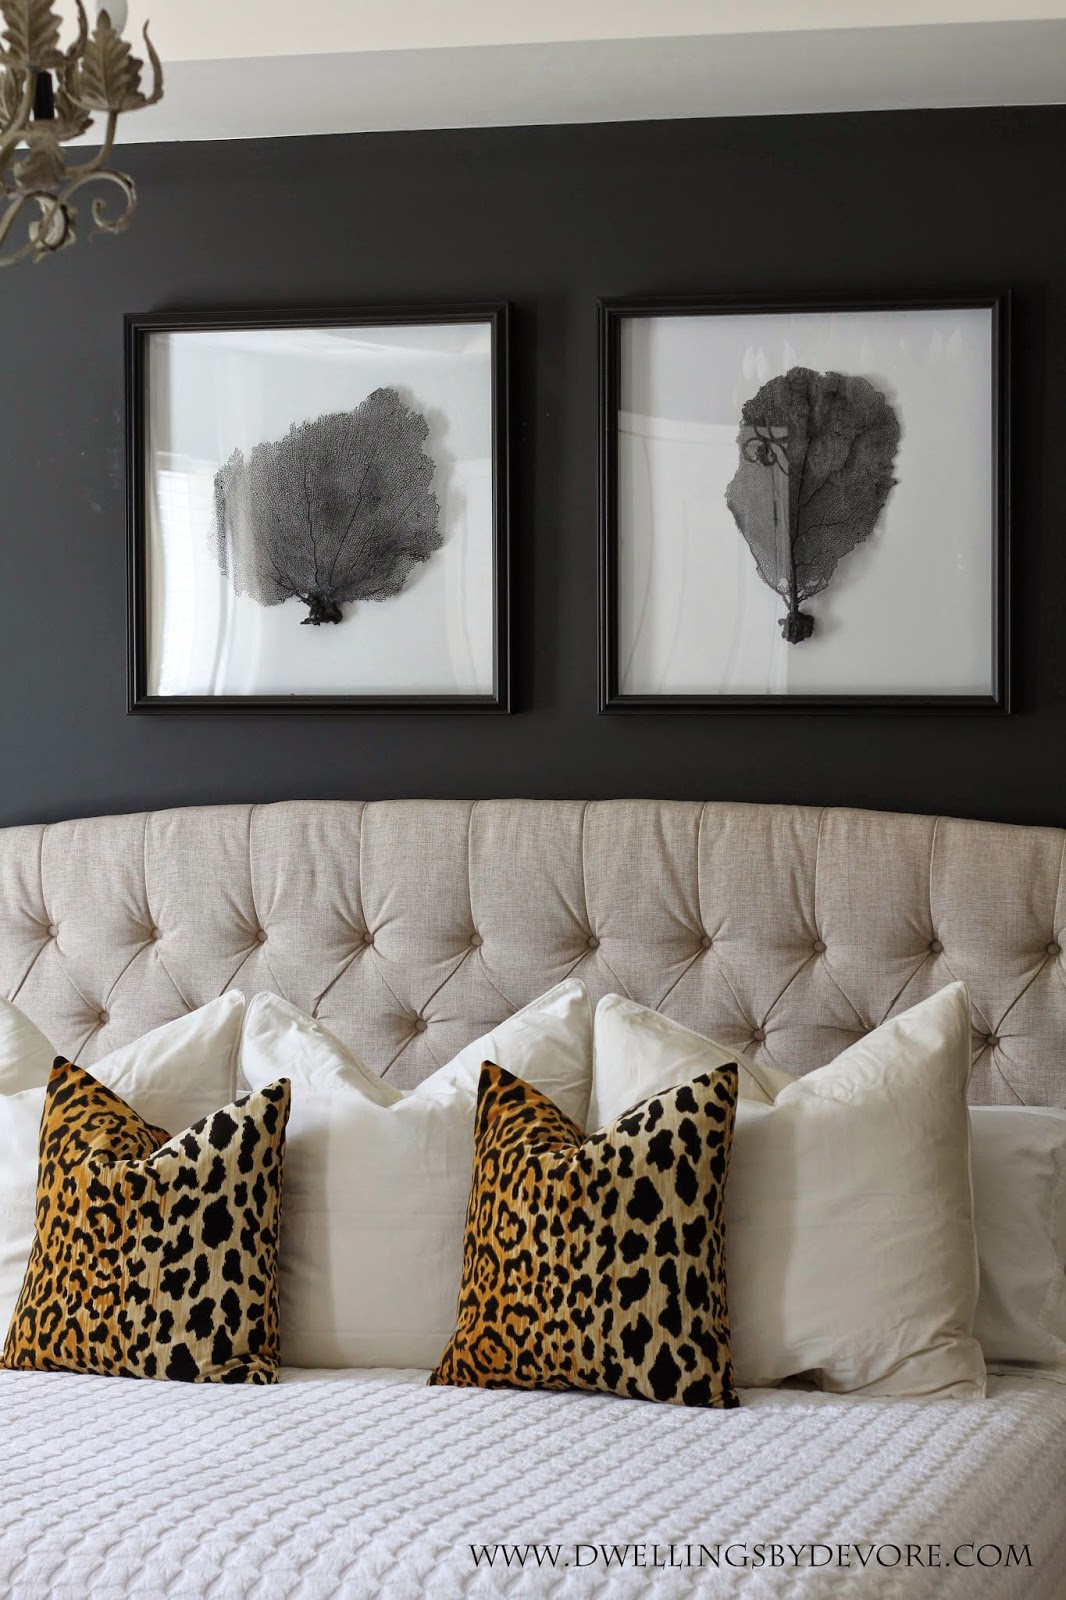
Sorry for this silence over here this week.  We've had kind of a crazy week.  Today I want to share with you the details of the sea fan artwork in our master bedroom.  This is seriously so easy to make, it hardly deserves a tutorial, but here you go!


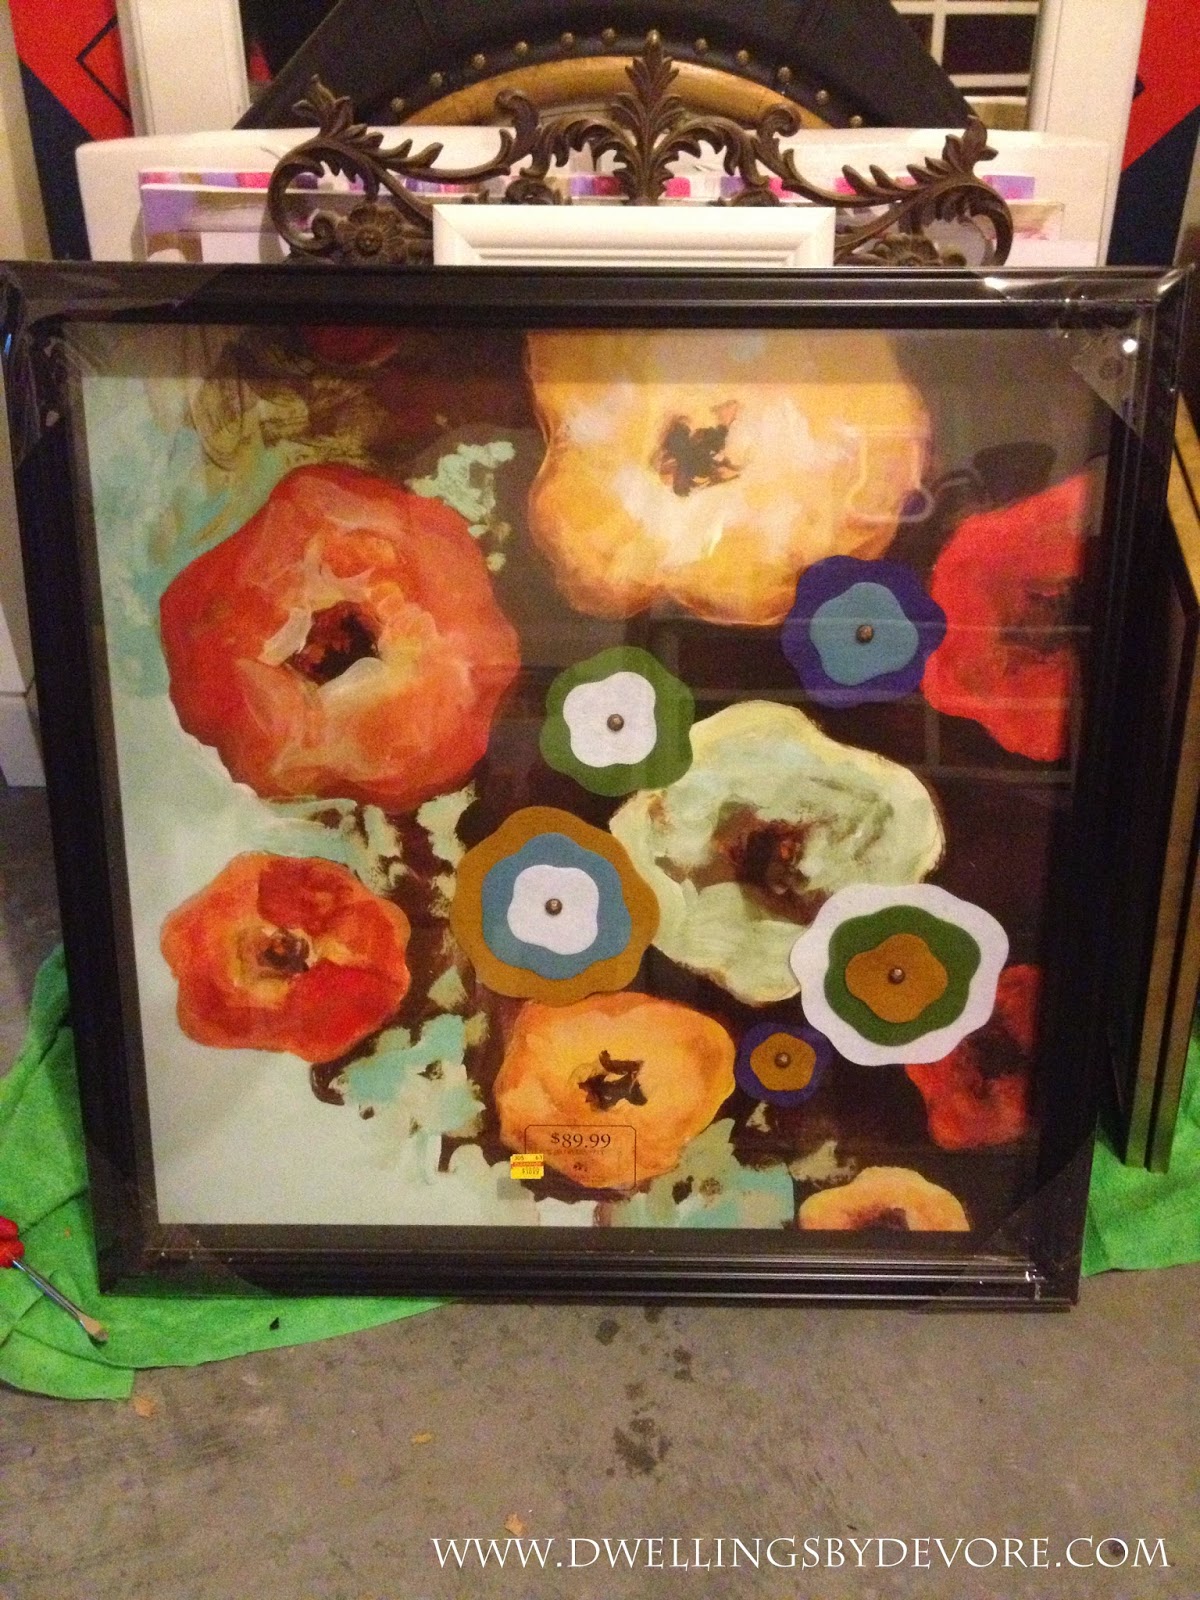
You can buy framed sea fans, but they are pretty pricey.  And there's really no need to buy them because they are so simple to DIY.  I started out with these shadowbox frames.  I bought two of them for such a steal when our Hobby Lobby was moving to a different location and having a huge sale.  Michaels also has some good shadow boxes and some great frame sales from time to time too.  And of course there's always the IKEA Ribba shadowbox frames.  Those are always great!  You can also keep an eye out at thrift stores or yard sales for ugly artwork in a shadowbox frame and just follow the steps like I did below.  

So, here's where I started with my frames.  I removed the existing artwork to create a blank backdrop for my sea fans.  The back of the frames were covered with craft paper so I just pulled that off and lifted up the tabs on the back and the art popped right out.  I wanted a white background, so I picked up some foam board from Hobby Lobby as well.  I tried using poster board at first, but it wasn't large enough to cover my frames and it kept getting dented and wrinkled, which drove me crazy!  


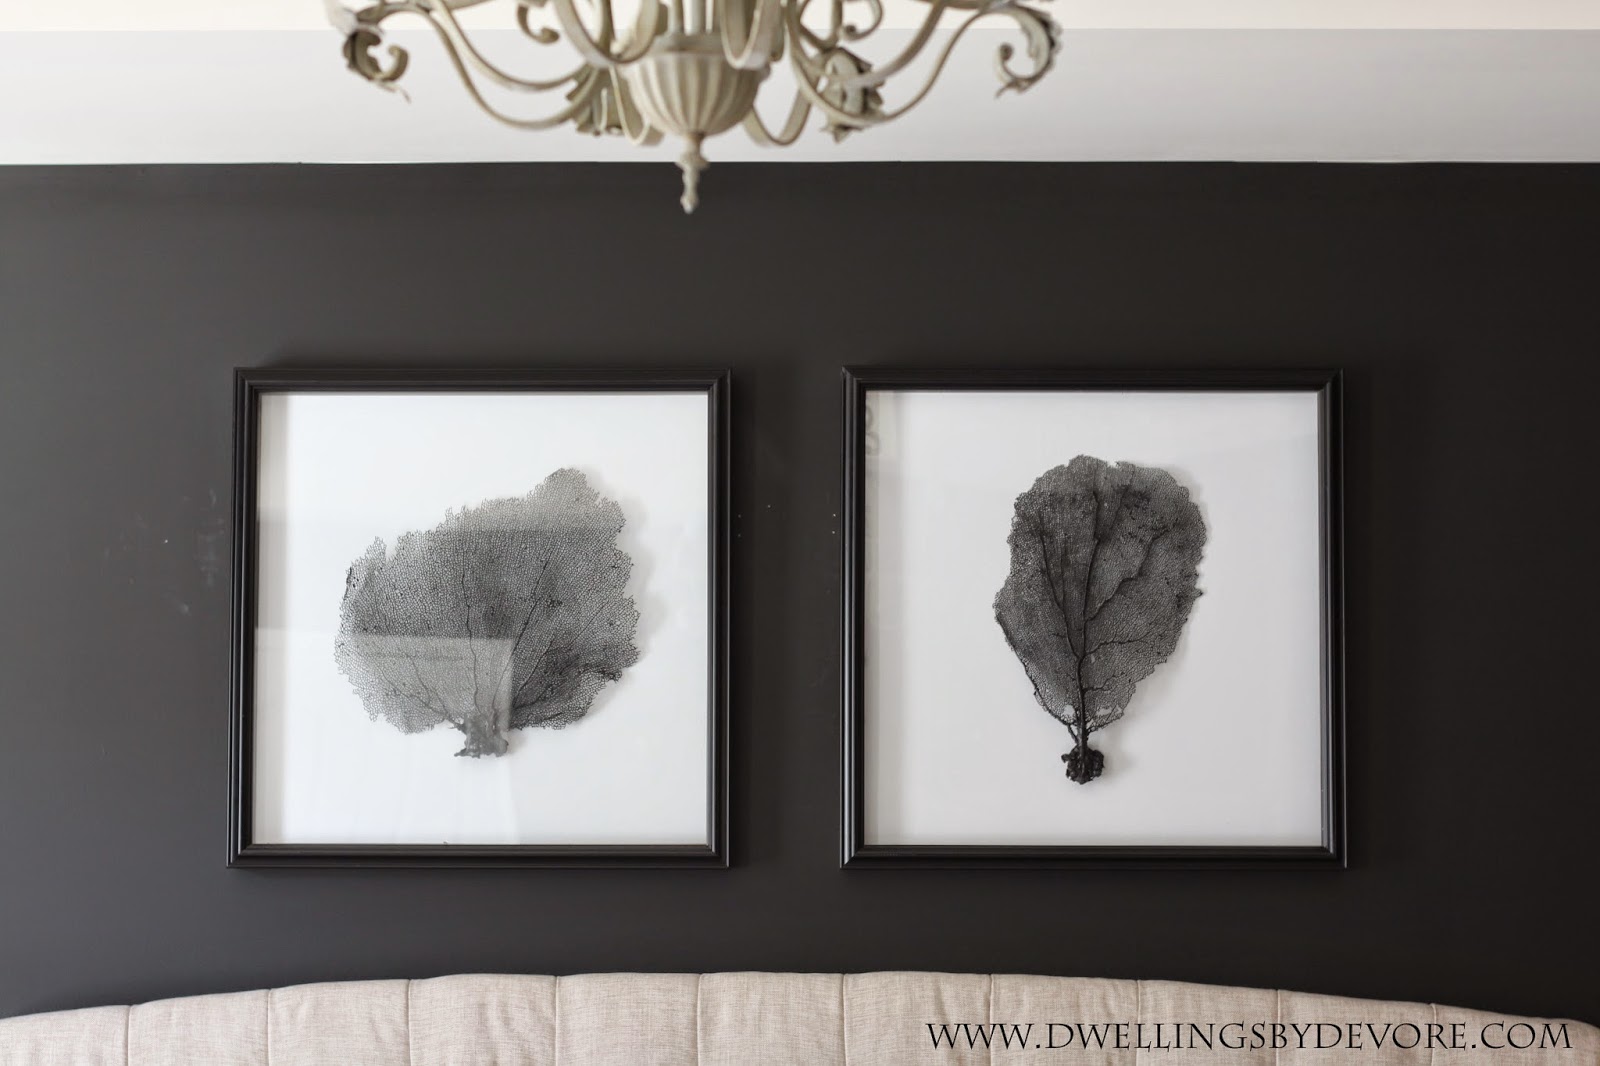
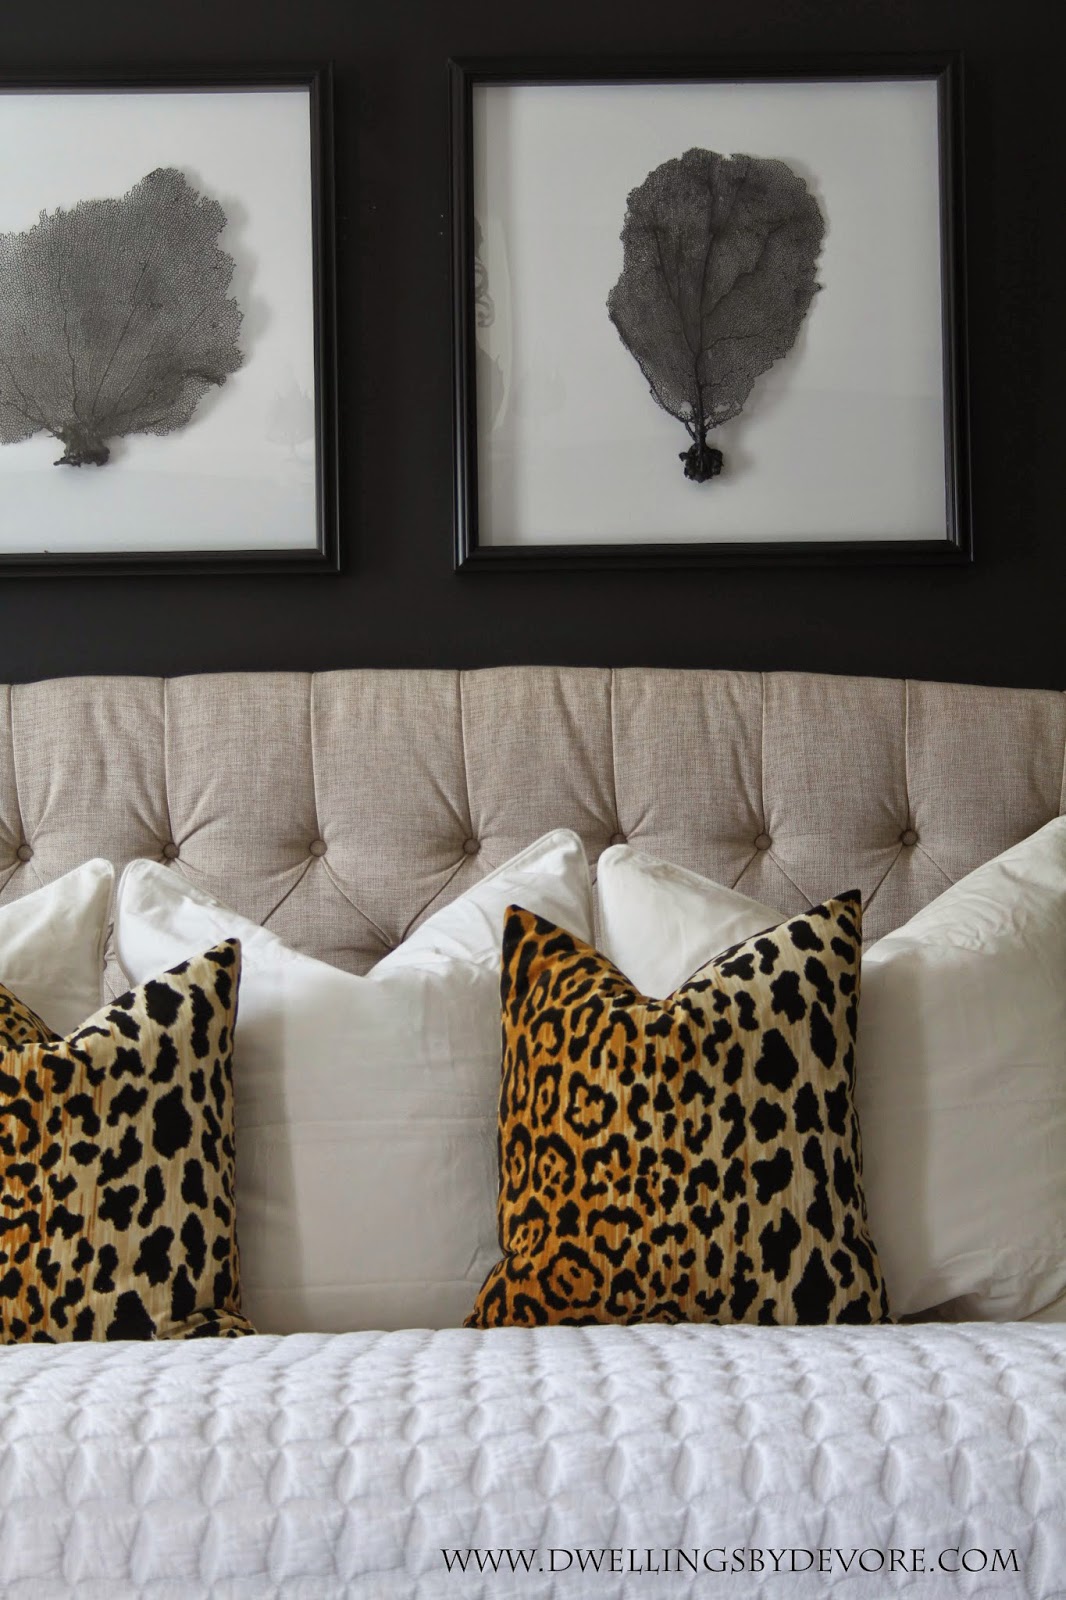
I found the sea fans for a great deal when were visiting Charleston.  I've also seen them at Homegoods from time to time and ebay has a good selection too.  I used them for this project way back.  I just gave them a fresh coat of black paint to make them tie in with our new bedroom.  After the paint was dry, I hot glued them to the foam board.  I put most of the glue at the base of the sea fan and then I added a few more drops to the ends for reassurance.  Then I popped the foam board into my frames and I had instant artwork!


Hope you guys have a wonderful weekend!

Gold Upholstered Bench Tutorial

One of my favorite elements from our master bedroom room makeover is this bench.  I wanted something with a metal base, preferably gold, but couldn't find anything that didn't cost a pretty penny.  I also needed it to be fairly long so it wouldn't look disproportional when placed at the foot of our king size bed.  I searched all my usual places (Craigslist, thrift stores, Goodwill), but came up empty handed.  Then, I happened to be at IKEA and checked the "as is" section.  You just never know what you'll find in there!  I saw this IKEA vittsjo TV unit and my first thought was, that would make a great bench!  The lines were perfect, the size was spot on, and the shape was exactly what I was looking for.  It was already put together which is a nice bonus when it comes to IKEA furniture.  And the price was great too.  


The only drawback was that the top was glass and the bottom shelf was solid.  I needed it to be the other way around so I could upholster the top.  That was an easy fix though.  I just removed the felt pads from the metal tabs on the top that were holding the glass in place and put the felt pads over the holes in the tabs on the bottom supports.  Then I drilled holes in the tabs on the top portion so I could screw the wood piece into place after I upholstered it.  Next, I painted the the metal base with Rustoleum Gold Metallic spray paint.    

The glass and the solid piece are the same size so you can easily interchange them.  I could have just switched them and had a bench with a solid top, but I wanted something upholstered.  I didn't want to spend a fortune on foam so I bought this mulit purpose foam pad from home depot.  It's 3" deep and was cheaper than most foam I could find.  


I cut it to size using an electric knife.  It's definitely the easiest way to cut it.  I've tried using a regular knife and scissors before and this way was so much easier.  It just cut right through it.  

Once my foam was cut to size, I used some spray adhesive to hold it in place on the board.  Then I covered the whole thing with batting and stapled that in place.  


Finally, I covered the batting with my fabric and stapled that in place.  I chose to use the Dalmation spot fabric from Tonic Living.  It's super affordable and it adds a nice graphic punch without competing with my leopard pillows.  It also gives me the opportunity to easily change up my color scheme down the road.  After I had the wood piece upholstered, I screwed it into place using the holes I drilled into the tabs at the beginning.  


I really like having the shelf below too.  I wanted to add a small punch of color because the rest of the room is neutral.  I found these vintage national geographic magazines at a thrift store and thought they would be a fun addition.


Thursday

Homemade Caramel Corn Recipe

This is definitely not a food blog, but this recipe is too good not to share.  I made it the other day and realized I had never shared the recipe with you.  You seriously have to try it!  My mom has been making this recipe for as long as I remember.  It was always a special treat during the holidays and she even made it as a favor for our wedding guests.


The recipe is really simple and turns out great every time.  People always request the recipe whenever I take it somewhere.  So, here it is for you to enjoy!  I'll just go ahead and warn you that I took the step by step photos one handed with my phone, but I thought they might be helpful so I'm including them. :)

3/4 C. unpopped popcorn
1 C. butter
2 C. brown sugar (I like dark brown)
1/2 C. light corn syrup
1tsp. Salt

1/2 tsp. baking soda
1 tsp. vanilla

Preheat the oven to 250 degrees.  Pop the popcorn using an air popper.  If you don't have one you can pop it on the stovetop, but I think it's best with the air popper.  I actually see them often at Goodwill so you can pick one up from there for a few dollars if you want to.  That's actually where I got mine and it works just fine.


I use a large roasting pan because it makes it easier, but if you don't have one you can also use two 13 x 9 inch pans.


Combine the butter, brown sugar, corn syrup, and salt in a saucepan and bring to a boil.  


Then cook it to the soft ball stage (235 degrees)  You'll need a candy thermometer for this step.  You can find them online or at pretty much any supermarket.


Once it reaches the soft ball stage, remove the mixture from the heat and add the baking soda and vanilla.  It will bubble up a bit when you add the baking soda so be careful!  Stir to combine and then pour the mixture over your popcorn.


Keep stirring until all the popcorn is evenly coated.


Bake it in a 250 degree oven for 1 hour, stirring every 15 minutes.  Once you take it out of the oven spread it out on a flat surface to cool.  Once it's cool, grab a handful and enjoy!  


Let me know if you have any questions.  I hope you enjoy it as much as we do!

Monday

Home Depot Style Challenge Reveal!

I'm so thrilled to share my Home Depot Holiday Style challenge with you all today over on the apron blog.  I went with a neutral theme, with a little animal print and a few earthy touches!  Here's a little sneak peak!


I'm still pinching myself that I got to be a part of such a wonderful project.  I had the best time creating my holiday mantel and I'm so thankful to the Home Depot for letting me be a part!  Head on over and check it out here!

Wednesday

BSHT Thanksgiving Table Setting

Thanksgiving is definitely one of my favorite holidays of the year.  Today, I'm excited to be sharing a little Thanksgiving table setting I put together for Blogger Stylin' Home Tours hosted by Lindsay at The White Buffalo Styling Co.  The tours started Monday and will continue through the rest of the week.  If you want to catch up start here and follow the links through the rest of the tours.


If you are coming over from My Fabuless life, Welcome!  I'm so glad you have taken the time to stop by.  As I mentioned above I love Thanksgiving and I also love having the opportunity to set a pretty table.   Growing up I remember my mom used to always set the table with coordinating plates, napkins, glasses, the whole shebang.  It was always fun to see what combinations she would come up with.  So, I guess I got my love for it from her.

I wanted this table to feel like fall, but I also wanted to put a little spin on it to make it feel a little less traditional. I thought the blue was a nice contrast and gave it the fresh look I wanted.


Trader Joe's always has the best flowers, especially for the price!  If you don't want to spend a lot on your table setting and really want to make an impact, start with a great bouquet of flowers!


Be sure to head on over to Rain on a Tin Roof for more inspiration!

Monday

Fall in Love Room Reveal!

I hope you guys had a wonderful weekend and a great Halloween!  We kept things pretty low key and just went to a few houses in our neighborhood.  Our daughter had a blast and of course ate way too much candy.  


I'm so excited to be sharing our Master Bedroom with you today as a part of the Fall in Love Room Challenge.  I wasn't sure I was going to get it all finished in time, but then again I have a bad habit of waiting until the last minute to get things done.  I tell myself I work better under pressure, but then I freak out a little at the last minute.  It's a vicious cycle.  Anyway, on to the room reveal.  I started by painting the walls black.  The color is actually Ralph Lauren Black Basalt.  I was nervous about how it would turn out, but I am so thrilled with the results.  I thought it might feel dark and dungeon like, but I kept the furniture/bedding light to help balance things out.  It doesn't make it feel small at all and some people have even said they think it looks bigger.  

Here's a little before picture of what the room looked like when we started.  


And here's what it looks like now!  I'll mainly just be sharing all the pictures in this post along with a few sources.  I have a few DIYs that I'll talk about in some upcoming posts in the next few weeks.  


Our big splurge for this room was the bed.  We've wanted to get a king size bed for the longest time.  My husband is kind of a buy guy and although he'll deny it, he likes to sprawl out.  So a king size bed seemed like a good idea.  Almost all of the furniture in our house is from Craigslist, thrift stores, or family members.  So it was actually really nice to buy something new and not have to do anything to it. We are really happy with it and hope to have it for many years to come.  For us, it was definitely worth the investment!


The sea fan artwork was a simple DIY project that I'll be sharing soon.


We moved our jute rug up from our living room.  It was shedding all over the wood floor and was driving me crazy.  I love how it looks in here though.  Now I just need to find a rug for the living room!


I've been wanting to incorporate this velvet leopard fabric into our home and this seemed like the perfect spot for it.  I think every room needs a little animal print!


This bench was another fun DIY I did for this room.  I'll be sharing the details on it soon too!


Here's a mini source list for the room:
Bed: Wayfair (similar)
Bench: DIY found here, fabric from Tonic Living
Wall Color: Ralph Lauren Black Basalt
Leopard Pillows: Fabric found here, sewn by me
Lamps: Hobby Lobby
Sea Fan Art: DIY found here
Curtains: DIY found here
Nightstands: Makeover found here

I hope you enjoyed a little peek into our home.  Thanks again to Cassie from Primitive and Proper for hosting this and giving me the motivation I needed to finish this room!  Check out the list below for the other participants' posts today and then follow along the rest of the week to see all of the rooms revealed.  

Monday
Tuesday
Wednesday
Thursday