Tuesday

Gingerbread Houses

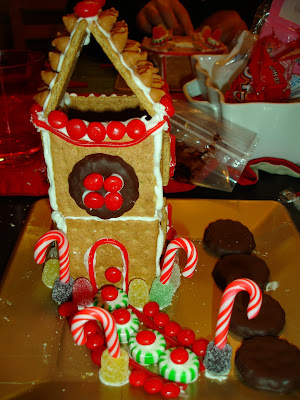
I love spending time with family during the holiday season.  Last weekend we got together at my sister's house and made gingerbread houses out of graham crackers and royal icing.  The girls definitly went the more traditional route and the boys decided to get a little more creative.  Here are some pictures of the houses we made...

This one is my brother's, complete with a snowman and dog in the front yard :)


and here is my sister's...


and mine...


and my mom's, with a swingset...


and my husband's, a little less traditional... :)


and my dad's, we're still not sure what it is...


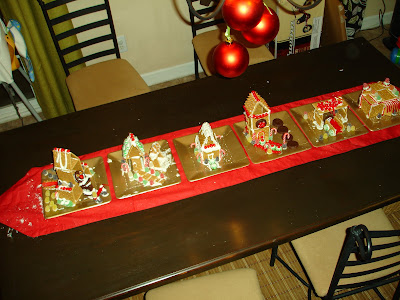
and all of them together...


Monday

Ladies Brunch

This weekend we had a ladies brunch at church.  Several of the ladies were asked to decorate a table and invite guests.  It was such a fun time of fellowship and getting to enjoy each other's creativity.  Each table was supposed to be decorated based on a Christmas song.  I chose to do "White Christmas" for my table.  I found most of the decorations from the dollar store and a couple were half off at hobby lobby.  Of course I had to throw in some sticks, which I'm sure isn't too surprising ;)  I thoroughly enjoyed getting to be a part of this event and even found a place in my dining room for the centerpiece I made.  Here are some pictures of my table and the other tables that the ladies decorated.  (Please excuse the blurriness/lighting, it was hard to take pictures in there.)
"White Christmas"


"Joy to the World"

"You're a mean one Mr. Grinch"


"Angels We Have Heard on High"


"Frosty the Snowman"

"We Three Kings"


"The Nutcracker"

"Away in a Manger"

"Light of the World"

"Let it Snow"

"It's Beginning to Look a lot like Christmas"

"It Came Upon a Midnight Clear"

"Charlie Brown Christmas"

And here are a couple more centerpieces I made for the food/beverage tables.  The wreaths were on sale at the craft store for $2 and the picks were 60% off!


Hope you enjoyed all the pictures!

Saturday

Adorable Cuff

Long time no post...Sorry about that, it's been crazy busy around here!  Hope you all are enjoying this time of year getting ready for Christmas!  I ran across this on anthropology.com the other day and feel a DIY project coming on.  I love how unique and fun this is.  It's $198!!  However, I think it would be super easy and fun to make and look great with a simple sweater or a holiday dress for a party!  I will have to share it with you when I eventually get around to making it...Hope you all have a great Saturday!


Monday

Headboard Instructions

Here are the instructions I followed to make my padded headboard.  It was really simple.  First, I purchased a piece of 1/4 inch plywood from Lowe's.  You can get them to cut it for you to the size you need it to be.  You want it to be a couple inches wider than your bed.  I think if I do it again I will use 1/2 inch plywood to give it a little more strength, but the 1/4 inch worked fine and made it pretty lightweight.  You can cut out legs to attach directly to the bed frame but I just opted to hang this one on the wall.  Either way it works.  Next, use spray adhesive to attach your 2 inch foam to the plywood.  Then, go around the edges trimming off any extra foam (you can use scissors or an electric knife to do this).  You wouldn't have to do this next step but I did just to make the edges a little softer.  I covered it with batting and stapled it to the back.  Finally, I covered the batting with fabric and put one staple at the top, one at the bottom, and one on either side.  I turned it over to make sure my pattern was straight and where I wanted it to be and then continued stapling all around the back edge.  Next, you can attach flush mounts to the back of the headboard if you are planning on hanging it on the wall and then you are done!  You can get really creative and fancy with these.  At some point I would like to make one with some fancy edges and possibly some tufting!
Below are some pictures of the steps I took....
Covering the plywood with foam....

then attach the batting....


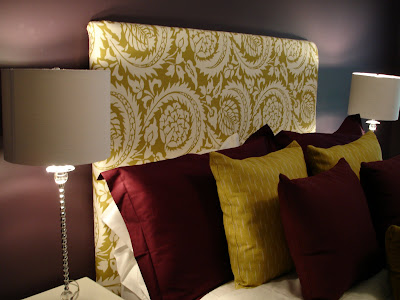
and finally (as you already have seen) attach the fabric and you have the finished product....


Friday

Tina's Room

Today I would like to show you a room I recently redecorated for a friend.  Unfortunately, I don't have the "before" pictures right now but hopefully I can show them to you in the future.  Basically the room was a blank canvas, white walls, no curtains, etc.  My mind went wild with all the possibilites but we finally decided on a deep purple.  I love the rich tones of the wall color and the brightnesss that the green adds.  For some reason, I was always intimidated by the idea of making a padded headboard but I knew it would add so much to this room.  I will share the details on how I made this one with you tomorrow but it turned out to be super easy!  I kept it pretty simple for my first one but next time I think I may do a little tufting or possibly a cool shape.  Anyways, without further ado, here is the room...


and the "T" artwork that I showed you before...


This shade of green was kind of hard to find, so I made these pillows to match. The fabric was only $2.49/yard at Hancock fabrics!


and the dresser looks pretty bare right now...we were waiting on the mirror to come in at the time this picture was taken.  Maybe I'll stop by there and take another picture with the mirror added so you can see it.


 I would have loved to do even more to the room but time and money were limited.  Hope you all have a great weekend!

Wednesday

Christmas Tree #2

I thought I would share some pictures of our other Christmas tree today.  Everything is pretty much the same as last year with a few added ornaments from garden ridge's 50% off sale! :)


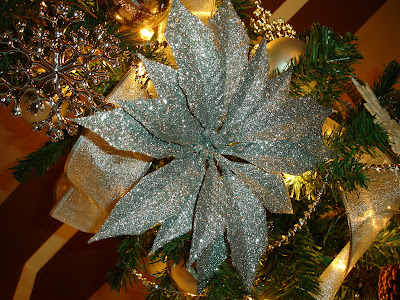
and these leaves were only $1.25 at Garden Ridge...I thought that added a nice touch of sparkle and some more dimension to the tree...


Tuesday

Christmas tree

This is the first year I have decorated more than one Christmas tree in my house.  I already had most of the stuff I needed to do it so I figured why not.  I found this tree on clearance last year for $1.49!!  It was too good of a deal to pass up.  I already had the ribbon and most of the ornaments (some are even mine from childhood which I really like.)  It's so hard to get the lighting right when taking a picture of a Christmas tree but here it is...


Found these birds at garden ridge for $2...

and these poinsettias are one of my favorite things on the tree and they were only $2.50 at garden ridge.  I'm sure you could make your own with fake poinsettias if you wanted to...

and on with the flash...