Wednesday

Gold End Table

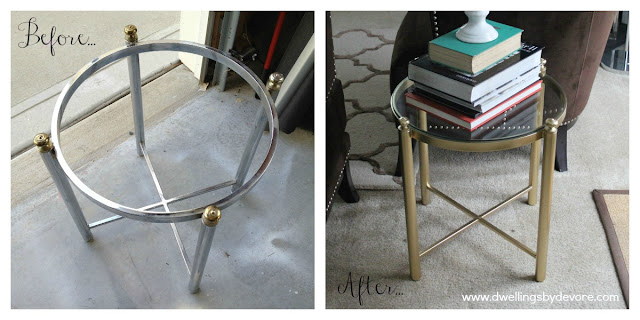
I mentioned in this post that we got rid of our old coffee table and end table to help babyproof the living room.  I wanted to sell the two together since they were a set.  I knew it would be easy enough to find a simple end table in my thrifting adventures.  I found this end table at Goodwill for $7, can't beat that.  It had a glass top which was exactly what I was looking for and overall it was in great shape, minus the beat up chrome finish.  Nothing a little spraypaint can't fix.  These pictures are a little dark, it's been a little cold and dreary here lately.

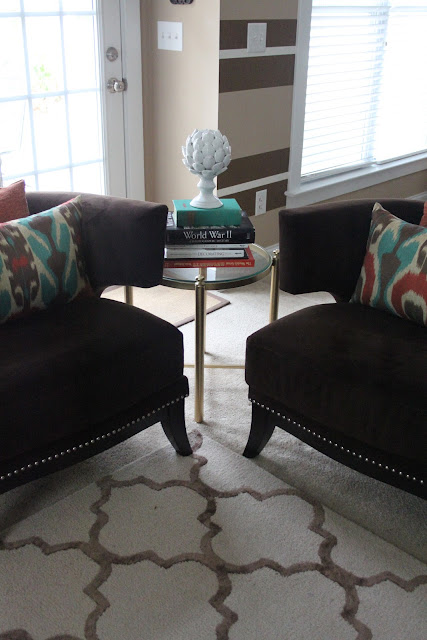
I gave it a quick coat of gold spraypaint (Rustoleum Gold Metallic) and it was good as new.  It's actually a little smaller than the previous table and works a little better with the space.


p.s.-Hope everyone has a safe halloween!  I'll be sharing a DIY costume I made for my daughter after we get some pictures tonight.  

Monday

Glammed up pillows

I've been wanting to change up the pillows in my living room for a while now to something a little more glamorous.  Since I've been on a bit of a gold kick lately I wanted to go in that direction.  I was inspired by these pillows at Target a few months ago.  I almost bought them but couldn't pull the trigger  knowing I had plenty of fabric at home that I could make pillows from for free.  

(picture from Target)

I've also always loved this pillow cover from West Elm.  To me it's a great combination of glitz and texture.  


So this project is a combination of those two inspiration pillows.  I started with some plain white fabric (it's actually part of an Ikea Ritva curtain panel that I had leftover from my daughter's nursery since they come in pairs and I only needed 3 panels)  The texture of the fabric worked really nicely for this project.  If you didn't want to make your own pillow you could use this $7 white cover from IKEA.  I used it to make the elephant pillow in my daughter's nursery and have been really impressed with how well it's held up.  

So, here's the basic square pillow cover I started with.


This next step isn't totally necessary, but I did it just in case the paint bled through.  I just slipped a paper bag in the pillow cover.


Now, it's time to glam it up.  I wanted a fun pattern, something chevronish, but I don't have the patience to tape off all those zig zags and make sure they are all even so I just went with a simple pattern that still resembles chevron.  I taped off my pattern with frog tape and made sure my pieces of tape were long enough to extend over the edge of the pillow and tape the whole thing to a piece of foam board.  I didn't want it to move during the painting process.


Then, I used my favorite gold metallic spraypaint from Rustoleum.  This is my go to gold, in my opinion it has the best finish without looking cheapy.  I also like this one, but the Rustoleum is a much larger can and therefore gives you more bang for your buck.  This particular spray paint seems very light and dries incredibly fast which is part of why this works.  I haven't tested this with other paints so I'm not sure if they would leave your fabric feeling crunchy or too heavy.  


So, spray the whole thing and then let it dry for a few minutes.  You can see in this picture how it gives it a subtle sheen and really brings out the texture of the fabric.    


Then, the most rewarding part, pull off the tape to reveal the white stripes.  As long as you make sure you press your tape down really well you shouldn't have any bleed through.  This project has opened up a whole world of opportunities for me.  I'm thinking of painting this headboard I found on the side of the road using this same technique.  I'll let you know how it goes if I try it.  The best part of this project is that I already had all the supplies so it cost me nothing, makes me happy and the husband too.


Tuesday

a little iphone preview...

I figured it was about time I showed you all some pictures of my powder room.  I've had it completed for a while now but just can't seem to get the lighting right to take pictures.  My sister is going to take some for me, but this is her busy season so eventually I will have a full reveal.  

Here's a reminder of what it looked like before.  


It was so dark in there, I'm really amazed how much the black and white stripes open up the room.

Surprisingly my iphone took better pictures of the room than my real camera so here's a little preview of how things turned out.  I madeover the old IKEA shelf that was previously in there, with a little gold and white spraypaint.  Looks like a new shelf and fits in much better with the new decor.  


I framed these prints from this book I had in my office.  It has some of the most beautiful shell botanical prints.  I had a hard time narrowing it down, but settled on these two because the shades of mint pulled in the minty mirror I madeover.  I chose floating frames (from Michaels) because I didn't want the frames to interfere with the stripes on the walls.  I wanted them to almost disappear.  


More (hopefully better) pictures to come!

Friday

Guest Posting

Today I'm guest posting over at Canoe Design.  I was so honored when I was asked to be a part of the Furniture Feature Fridays series over there.  Hop on over here to see which piece I chose as one of my favorite design pieces.  Hope you all have a wonderful weekend!

Wednesday

From Trashy to Classy

I know what you are thinking, another trash can post?  Well, I've been doing small projects around the house that cost little or no money to spruce things up a bit.  One thing that always bugged me was our trash/cleaning closet.  White walls and a trash can don't mix well.  Something inevitably gets on the walls and won't come off no matter how much you scrub.  So things just start looking, well...trashy.  This project didn't take long and cost me $0 because I had everything on hand.  I decided to paint the walls semi gloss black (it's what I had and I knew it would be wipeable and hide stains) and then I printed out these little labels using some vynil and my Silhouette machine.  I think this would also be great using chalkboard paint and chalk to label your items, that was my original plan.   


 Normally this is where our trash can resides, but I thought one picture of a trash can was enough so I took it out for the pictures.