Thursday

Pink and Gray baby girl Christmas tree

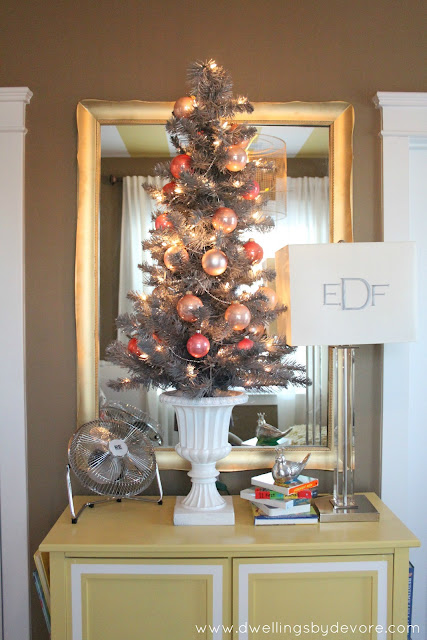
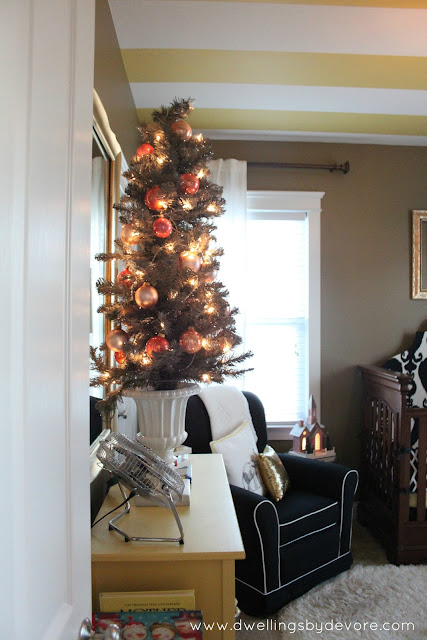
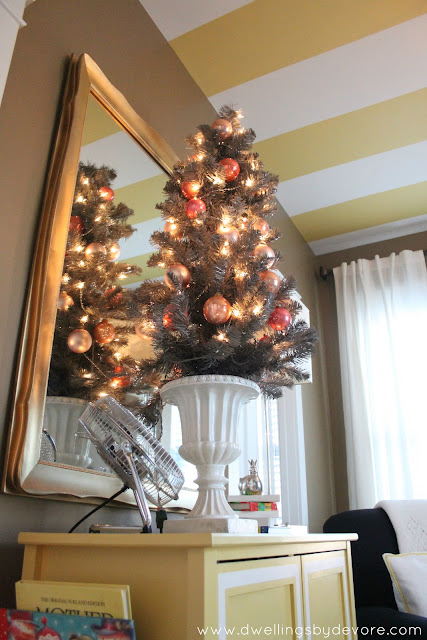
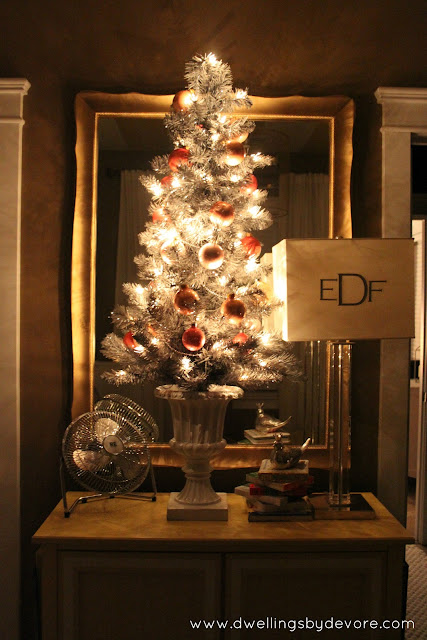
I've stored away a some pink Christmas decorations I found a few years ago hoping I'd have a little girl one day to use them for.  I can't believe I have a little girl now and I'm using them for her, time sure does fly.  I wanted to do something in her room, something simple and something she couldn't get to.  I decided to use a small gray tree that I used a few years ago in another area of our home.  The urn was a thrifted find from a few years ago too.  The tree was the perfect size and I knew it would fit on top of her cabinet which meant she couldn't get to it to pull it down.


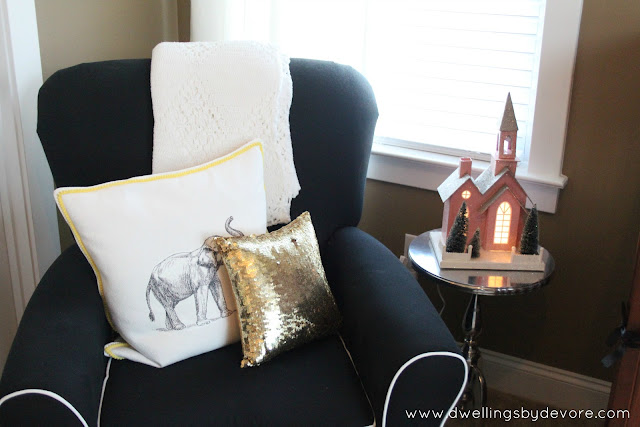
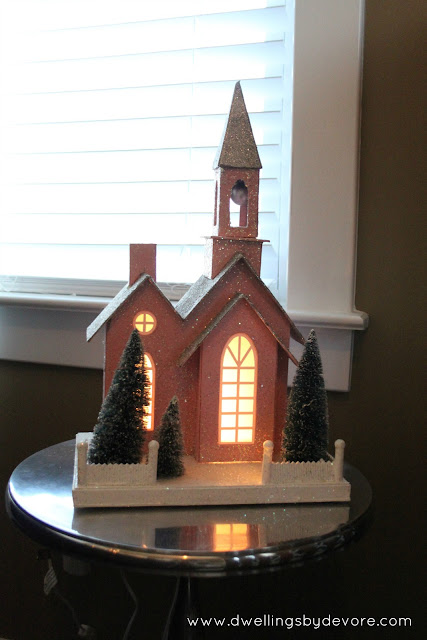
I also purchased this small light up church from Target a few years ago.  I bought a pink one and a blue one so I could use them for our future children either boy (blue) or girl (pink).


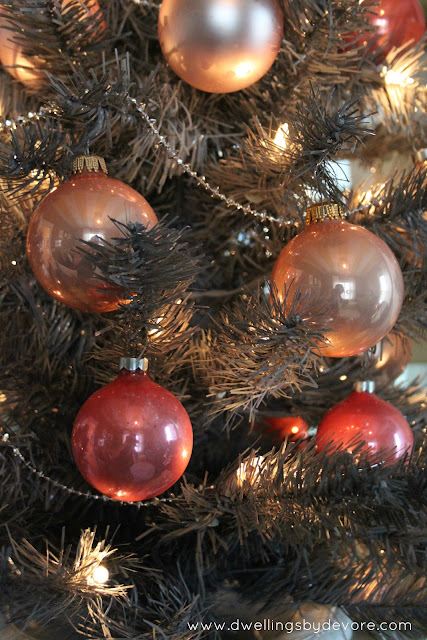
I used vintage ornaments that I purchased at thrift store a few years ago.  I think I paid $2 for the whole bag.  I love the look of them, it's hard to tell in the pictures but they have almost a mercury glass look to them because of the way they've aged.


love the way it glows at night


Wednesday

Homemade Caramels

I've always wanted to make homemade caramels, but I've always been too intimidated to try.  Then I got my latest issue of Martha Stewart magazine and there was a recipe for homemade caramels, I took it as a sign to finally give it a try.  I won't blame Martha for the way they turned out as it was probably a combination of things.  They are actually still quite tasty they just didn't get quite as hard as I would have liked.  I think I was a little paranoid about taking them off right when they reached the correct temperature and didn't leave them on the heat quite long enough.  My husband still gave them a thumbs up.  They were really easy to make and I'll definitely be giving it another try.  I've heard Ina Garten's are pretty tasty too, might give those a try on the next go round.   

Here's the recipe from Martha Stewart

Ingredients

  • Vegetable oil, for baking sheet
  • 2 cups heavy cream
  • 2 1/4 cups sugar
  • 6 tablespoons unsalted butter, cut into pieces
  • 1 1/4 cups light corn syrup
  • 1/2 teaspoon coarse salt
  • 1/2 teaspoon pure vanilla extract

Directions

  1. Lightly brush bottom and sides of a 9-by-13-inch rimmed baking sheet with oil. Line with parchment, leaving a 2-inch overhang on long sides; lightly brush parchment with oil.
  2. Bring cream, sugar, butter, and corn syrup to a boil in a large saucepan over high heat, stirring until sugar dissolves. Reduce heat to medium-high; cook, stirring occasionally, until caramel reaches 248 degrees on a candy thermometer, about 15 minutes.
  3. Immediately remove caramel from heat, and stir in salt and vanilla. Pour caramel onto baking sheet, and let stand, uncovered, at room temperature at least 8 hours and up to 1 day.
  4. Lifting by parchment overhang, transfer caramel to a large cutting board. Cut into 3/4-by-1 1/4-inch pieces; wrap each piece in waxed paper or cellophane.

    Have you made homemade caramels?  How did they turn out?  Any tips?  

Tuesday

Easy DIY turkey shirt

I wanted something cute and unique for my daughter to wear on her first Thanksgiving.  I saw lots of cute things on Etsy and other places on the web, but didn't want to spend a lot seeing as how she was pretty much going to just wear it one day.  So I did a little googling to get some ideas for something I could make for her.  My goal was to use what I had and not spend any money, mission accomplished!  I found this great tutorial at the cottage home.  She does a great job explaining her steps and even provides a template for you.  I took a few pictures along the way, but it's pretty self explanatory and you can check our her post for more detailed steps. 

Here's what you'll need:

Supplies:
1 Shirt or Onesie
6 different prints of scraps of fabric
Fusible interfacing (I used wonder under)
Turkey Template (click here to get hers)
Sewing Machine
Iron
Thread

I started with just a plain white onesie that I already had.  Then I scoured through my scrap material and picked some different fabrics that coordinated well and brought in a little brown and orange for some festive flair.  


Like I said, I didn't take a lot of progress pictures (check out her post for more detailed steps), but basically I ironed the fabric to the wonder under and then traced her Turkey template and cut out the pieces.


Then, I peeled off the paper from the back of my pieces and placed them on the onesie.  I played around with the arrangement of the "feathers" until I got them the way I wanted.


Then, I ironed it.  (make sure you put something like a piece of cardboard inside the shirt so you don't iron it together)  I placed a damp cloth over it and then pressed and lifted the iron over each area.  


Then, to dress things up a bit I stitched around the edges of the feathers and the body of the turkey.  It's not perfect but I kind of like it better that way.  Then, I just stitched some eyes, a beak, and legs on it with some heavy weight thread.  I would have probably gone with buttons for the eyes if my daughter were a little older, but right now she's into putting everything in her mouth and I just didn't want to take the chance of it coming off in her mouth.


pair it with a tutu and a jean jacket and you've got a perfect Thanksgiving day outfit!


I also made a boyish version for my nephew, who's 6 months old, but forgot to take a final picture of his, so here's an iphone pic of his before I put the eyes, mouth, and feet on it.

Monday

I'm dreaming of a flocked Christmas

Sorry for the silence over here, we had some computer issues and just got our computer back.  I have always loved the look of flocked Christmas trees.  My parents have this Christmas book (that they put out every year) with all different Christmas pictures in it and one particular part of the book has a huge flocked Christmas tree with pictures of the people flocking it.  As a kid, I always looked forward to pulling that book out every year and looking at that particular part.  I don't know why it fascinated me so much but it was so neat to me.  Ever since then I have loved flocked Christmas trees.  We have a fake Christmas tree because it's easy and cost efficient, but one year I will have a real, flocked Christmas tree!  Random fact I found via martha stewart, in the early 19th century people used to moisten Christmas trees and cover them with flour for that snowy look, interesting huh?  

Here's some inspiring images of flocked Christmas trees done right.


via Canadian house and home


and I'm sure we've all seen this beauty from Cottage Living Magazine


via pinterest (source not available)


via martha stewart living magazine

Have you ever had a flocked tree?  I broke the rule this year and put up all our Christmas decorations about a week ago.  I just couldn't want this year and wanted to everything up before family came to visit for Thanksgiving, pictures to come!
  

Tuesday

Oh Anthro

On a recent trip to the mall I decided to pop into Anthropologie and peruse their sale racks and as always I was amazed by their store displays.  I think that's something that they have become known for.  How fun would that job be?  To create the displays for their store.  

This one was my favorite.  If you look closely you can tell it's a chandelier made from twine and clear plastic spoons.  Isn't that cool?  Looks like a high end chandelier.


This one caught my eye too, a "lamp" on a chalkboard, how clever!  I think something like this would be great in a playroom or a room with a whimsical flair.


Have you seen any great anthro displays lately?  

Monday

Layered lighting

I couldn't let the old shade from my dining room light go to waste so I found a new place to use it in my  home.  I love the capiz shell chandelier in my kitchen nook, but it always felt a little small for the space.    You can read my original post about it here where I found it on craigslist and actually layered two lights together to make it fuller.  Anyways, on to the new light.  So once I removed the shade from the dining light I decided to add it to the kitchen light to make it a little more substantial and interesting.  It fit perfectly and definitely makes it look better in there.  I love it when I'm able to reuse things in my home in a different way.  

Here is what it looked like before (this is an old picture so things have changed a bit in there)


and after, you'll also notice I moved the sunburst mirror from the living room into this room.  It fits much better in this space and doesn't get lost on the wall.  The botanical prints made their way on over to my mom's house where she'll be using them for her guest room.


I updated this area a little bit with $5 horsehead and a few other thrifted accessories.  


This little fu dog is one of my favorite parts, don't ask me why I like these things.  I know a lot of people probably think they are little scary, but the gold spraypaint makes him a little friendlier looking to me.


as for how I did it, I just slipped it over the top as you can see in this ariel view.  Don't mind the dust, just keeping it real.  You can add a drum shade to pretty much any chandelier.  I did it for my entryway chandeliers too.  


Thursday

Hooty Hoot!

I hope everyone had a safe and happy Halloween!  Ours was pretty low key.  We went to my parents house and visited a few neighbors and called it a night.  I wanted my daughter's halloween costume to be special this year because it was her first halloween.  I contemplated several different things from mermaid to a cabbage patch doll, but settled on an owl when I found this great inspiration hat on Etsy.  I showed it to my mom and she said she would love to make it for baby girl, perfect!  If you want to make your own, check out this tutorial.  Now what to do for the rest of the costume?

Believe it or not it was inspired by this rug I found at Ross.  I actually almost bought the rug and turned it into the costume but thought it might be too heavy and hard to cut and sew.  


So, instead I made my own version.  I started with a plain white onesie and a sheet.  I ripped it into small squares because I wanted the edges to be frayed for a little extra texture.


Then, I put a dab of glue in the middle and pinched it together


Then, I glued these pieces one by one all over the onesie.  Tip: Before you start glueing the pieces on the onesie make sure you have something inside the onesie to make sure you don't glue it together.  I just stuck a paper grocery bag inside mine.  I also cut off the sleeves of the onesie because I didn't want to bother with the sleeves and thought it might make it too hard to get off and on.  


Then, for the front I wanted something a little different so I added some fur that I found at Hobby Lobby.  Unfortunately, they only had fur by the roll not larger pieces in the color I needed so when I put the outfit on her there are gaps between the fur.  Oh well, lesson learned.  So if you do this try to find one continuous piece of fur.  Then I added a little trim to the top and a fabric flower I made from some scrap material.  There are lots of great tutorials for these out there.  I added some glittery tights from Target, a long sleeve onesie to go underneath (I did this for warmth and comfort because the hot glue left hard spots on the inside of the onesie), and some boots she already had (also from Target) and my little owl was ready to go.   


sometimes owls get cold and need a little jean jacket...


and she was a little watermelon for a fall festival we visited in our town, my sister got her this outfit (from Children's place) so we figured why not?